Russian Honey Cake (Medovik)
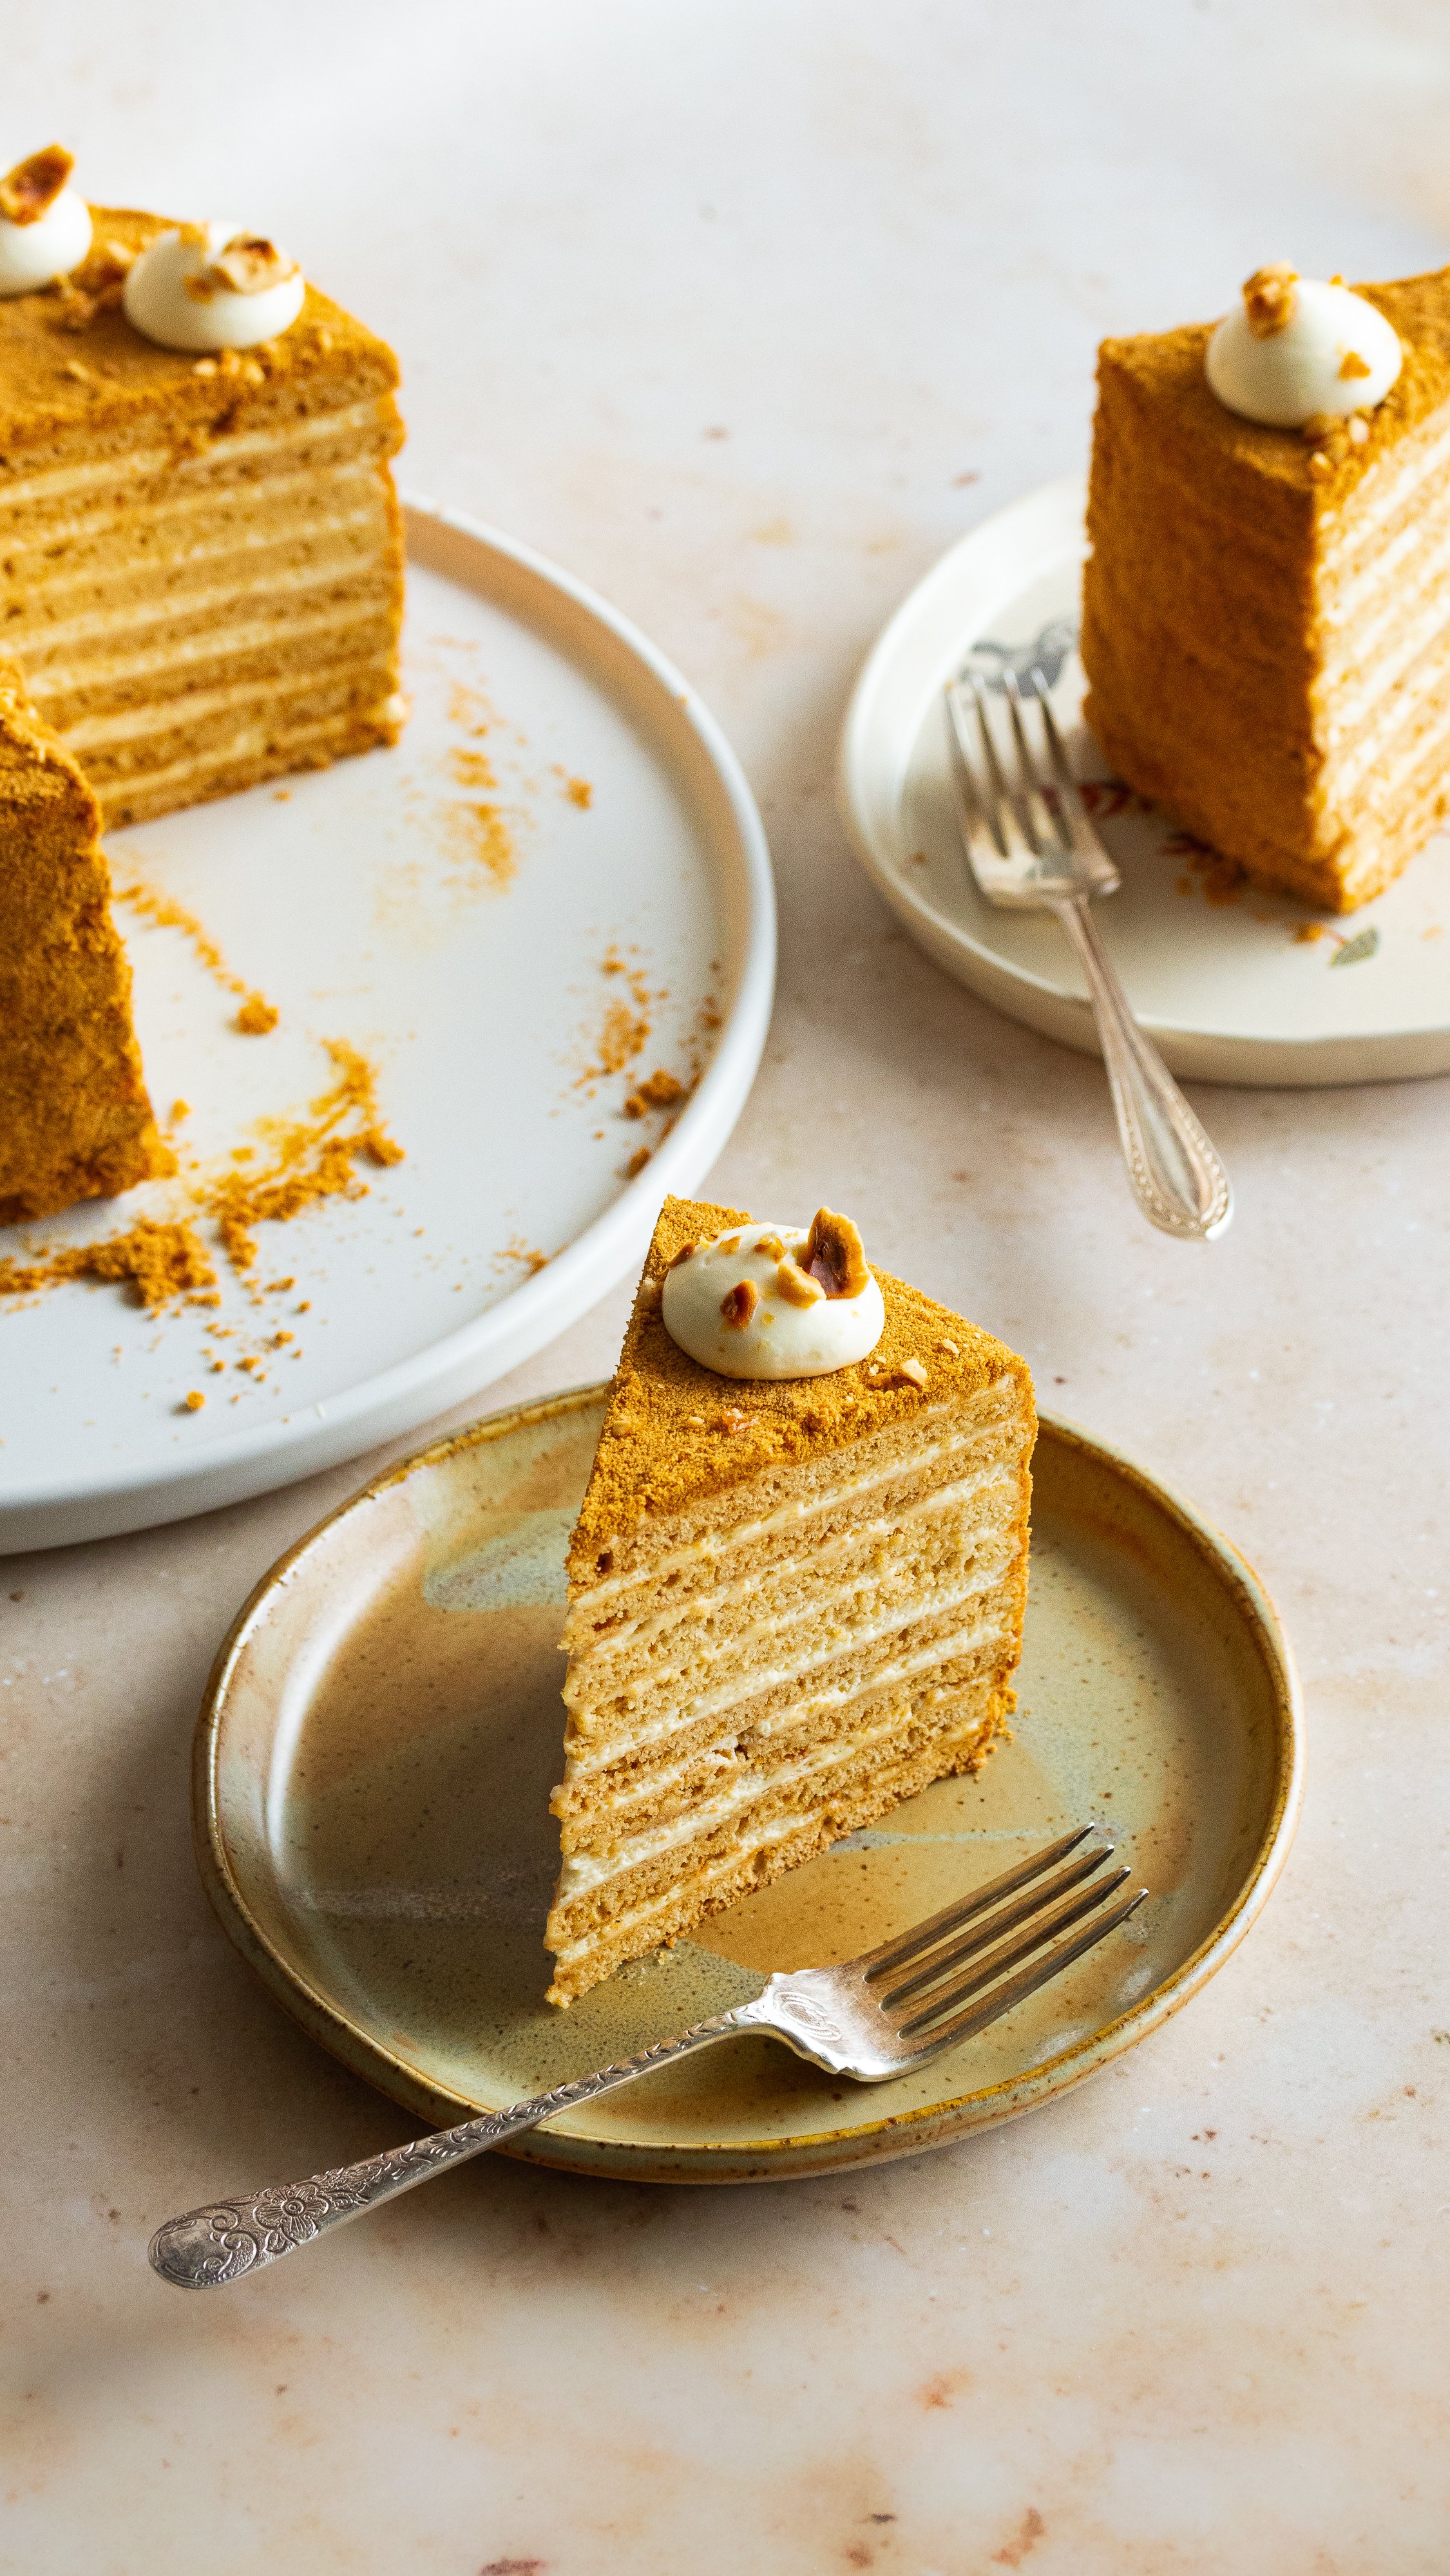
Medovik is a traditional 8 layer honey cake from Russia, and truly one of a kind. It is soft, moist, with lots of caramely-nutty flavour, and just enough tang from the sour cream to beautifully balance out all that honey goodness.
Fun fact: did you know that this cake was created back in the 19th century by a young confectioner, who whipped up this cake with honey & sour cream, without realising that the empress actually hated honey? But of course, the cake was so good that she fell in love with it! So if you’re on the fence about this cake, the empress can vouch for it.
As delicious as this cake is, it is also a labour of love. It’s not a difficult cake, however, it is labour intensive. So get ready to get hands on. There are only two components to this cake, as the outer coating is just an extension of the cake:
Cookie like cakes, that are thin and crispy when baked but soften like a sponge after assembly
Sour cream frosting
And most of the time consuming part happens with the cake layers itself.
Let’s talk about this confusing cake situation.
So, if you’ve ever tried your hand at this cake, you know there’s a lot of different recipes out there that can be very confusing. Some are thick cake batters, some are runny cake batters, some are cookie doughs…it’s madness. Luckily, I’ve done all the research so that all you gotta do is go ahead and enjoy this cake…and of course make it, but that’s part of the fun.
After doing a fair bit of research and going through a good few traditional recipes, this is what I’ve concluded. The traditional way of making this cake is by making cookie like cake layers, that are thin and crispy when baked, but as you assemble and let the cake sit overnight, the cookies absorb some of the moisture from the frosting to get soft and cakey. The result- you’re left with 8 beautiful layers of soft, moist, dreamy cake.


Recipe
Serves: 8
Ingredients
For the burnt honey:
100g honey*
2 tbsp cold water
For the cake:
85g honey
30g burnt honey (from above)
67g light brown sugar
80g salted butter, cubed
1/2 tsp vanilla paste
110g eggs ~ 2 large eggs
340g plain flour
3/4 tsp bi-carb soda
1/2 tsp cinnamon powder
1/4 tsp salt
For the sour cream frosting:
380g heavy cream (minimum 35% fat)
160g sour cream
50g burnt honey (from above)
20g light brown sugar
20g hazelnuts, roasted and chopped, optional
Method
For the burnt honey:
In a small saucepan, add the honey and place over medium heat. Cook until the honey starts to caramelise, turn deep amber in colour and starts smoking just a little~ 8-10 mins. Remove from heat and add the cold water. Stir to combine. Keep warm.
For the cake:
Preheat oven to 190°C.
In a large bowl, add the honey, burnt honey, butter, brown sugar and vanilla paste. Place over a bain marie.
Cook until all the butter melts and the mixture is hot. Whisk occasionally to combine well.
Remove from heat and keep aside for a couple of minutes to cool down.
Meanwhile, whisk the eggs in a small bowl. Keep aside.
Weigh out the dry ingredients and sift together. Whisk to combine. Keep aside.
Start whisking the honey-butter mixture and pour the eggs into it in a steady stream.
Add the dry ingredients and stir to combine well. It will look like a thick sticky gingerbread dough.
Divide the dough equally into 4 (174g each). Transfer one portion to a silpat, place baking paper on top and roll out to 3mm thickness. Remove the paper.**
Grease a 15cm cake ring with oil and cut two circles. The dough will be sticky so do not try to remove the excess. Bake for 8-10 mins or until the deep golden brown. (It can take 11 mins if using silpat.)
While the first batch is baking, repeat the process with the second portion. Repeat with the remaining portions. You should have 8 layers of cake.
Put all the excess trimmings on a baking tray and bake for another 5-6 mins or until totally crispy. Cool down and then blitz to a coarse crumb. Keep aside. We’ll use this to cover the cake.
For the frosting:
In the bowl of a stand mixer, add all the ingredients and whip on medium speed until medium stiff peaks form. Refrigerate until use.
For the assembly:
Place a layer of cake on a plate or a 7 inch cake board. Add a generous dollop of the frosting and spread evenly using a palette knife. Place another layer of cake on top. Repeat until all the cake layers have been used up.
Cover the top and sides of the cake with frosting and smoothen out using a palette knife. Refrigerate for 5 mins.
Use your hands to completely cover the cake with the coarse crumbs. Clean off any excess from the plate. Refrigerate for minimum 8-10 hours. If you have any frosting leftover, transfer to a piping bag and refrigerate for later.
To finish: pipe the leftover frosting on top. Garnish with roasted hazelnuts. Cut into slices and serve with a cup of coffee.
Notes:
*- The quality of your honey will determine the flavour of the cake. Use good quality honey for best flavour.
**- I find this to be the quickest way to do this. If you do not have a cake ring, you can trace out a 15cm circle on baking paper and use as template. Make sure to grease the baking paper before putting it onto the dough. In this cake, it is better to divide the dough into 8 pieces and roll individually. This recipe is only suitable for 15cm cake. If you want a bigger cake, you’ll have to scale the recipe.
If you enjoyed that and tried it at home, please tag me at @myyummyspatula on Instagram so that I can see all your bakes! For more BTS stories, updates and fun, you can follow long here:


